 Choose the right
flooring and materials
1. DECIDE ON THE FLOORING TYPE & FINISH
As well as design and finish, the type of laminate flooring you choose should be influenced by where and how it will be installed. See below and for a summary to help you decide. The technique to fit flooring with the Twin Clic system differs slightly to flooring with the Rapid Fit system. Rapid Fit is faster and easier to fit on your own, especially when you are covering a large area. Both are straightforward and do not need gluing or nailing (you should never glue or nail down a laminate floor).
2. SELECT THE CORRECT UNDERLAY AND DAMP-PROOF MEMBRANE
Selecting the right underlay and damp-proof membrane (DPM) for the type of flooring and room setting is crucial. Never use carpet underlay under laminate flooring. Carpe and vinyl flooring will need to be lifted before you lay your floor. See “Prepare the subfloor” on the page opposite and and for a guide to suitable options. If in doubt seek further advice.
Skirting or scotia
There are two options when it comes to the finish around your floor: skirting or scotia. Using skirting will give the most professional finish, but you will need to lift existing skirting before you install your flooring. You can either reinstall it afterwards or replace it with new skirting (skirting needs to be at least 15mm thick in order to cover expansion gaps). Using scotia is an easier option as it fits directly against existing skirting.
Threshold strips and pipe surrounds
At door openings you should use a matching threshold strip to cover expansion gaps and neatly finish the flooring. In situations where the floor is longer or wider than 8 metres, perhaps where a living room and dining room are open plan, you should leave an intermediate 10mm expansion gap at a suitable location, and cover it with a flat threshold strip. Fit pipe surrounds to neatly cover gaps around radiator pipes.
4. CALCULATE HOW MUCH FLOORING, UNDERLAY AND TRIM YOU NEED
Multiply the maximum length of the room by the maximum width to get the area in square metres and add 10% to allow for wastage. Always round up the number of packs you purchase. Don’t forget to take into account any chimney breasts when calculating the length of skirting or scotia you will need.All Wickes’ laminate flooring can be laid on any sub-floor, timber or concrete. The subfloor needs to be flat, dry and clean.
CONCRETE SUBFLOORS
Check existing screeds and concrete for moisture. This can be carried out using a moisture meter or alternatively sheets of polythene approximately 1m2 can be taped to the screed and a heavy weight placed on top for 24 hours. The screed will discolour or moisture will appear under the polythene if there is any present. If this happens you should stop and seek expert advice.
New concrete floors must be completely dry; do not lay flooring onto recently laid concrete. The thickness of the concrete will determine the drying time, but in all cases a minimum of two months is required for concrete to dry thoroughly. Allow around one day per mm for the first 50mm and then 1½ days for each additional millimetre of thickness thereafter.
The subfloor must be flat. If it has hollows deeper than 2mm over a 1m length, level it first using Wickes Floor Levelling Compound. Small indentations or protrusions of up to 3mm can be covered adequately by Fibreboard or XPS underlay in some cases (see ).
Finally, lay a damp proof membrane (DPM) sheet (see for a guide as to which one). Lay the membrane with taped 200mm overlaps and run it up the perimeter wall behind any skirting.
TIMBER SUBFLOORS
Ensure the subfloor is flat - no more thana 2mm difference over a 1m length. All floorboards should be firmly screwed down and all nails punched below the surface. Small indentations or protrusions of up to 3mm can be covered adequately by Fibreboard or XPS underlay in some cases (see )
The subfloor should also be dry. The presence of moisture on a timber subfloor should be obvious to the naked eye. Replace any damp boards or timbers. Don’t use a plastic damp-proof membrane over a timber subfloor. If a moisture barrier is required – for example at ground floor level – use bitumen-backed building paper and then an appropriate underlay (see ). Failure to protect the flooring from moisture penetration from below may lead to board expansion and distortion.
BEFORE YOU START
Leave the unopened packs of flooring lying horizontally on the floor in the room where they are to be laid for at least 48 hours so it can acclimatise to the room’s temperature. Do not stack near radiators or in direct sunlight. If you want to remove the skirting then do so before you begin laying your floor. The following steps are a good guide, but are not a substitute for following manufacturer’s instructions - please read these thoroughly before you start.
INSTALL THE UNDERLAY
(IF REQUIRED)
and show the options available. Fitting is dependant on the type you choose so follow manufacturer’s instructions.
The difference between Rapidfit and TwinClic flooring systems from Wickes.co.uk on Vimeo.
1. Start to lay the planks
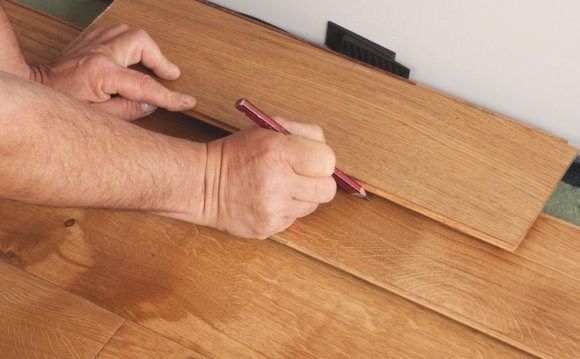
The last row of flooring you install must be at least 100mm wide, so if you need to adjust the first row to compensate then calculate that and trim the planks accordingly before you begin.
Planks should be laid lengthways, parallel to the longest side of the room and towards the main incoming source of light if possible. Use spacers to create a 10mm to 12mm expansion gap between the floor and the wall or skirting. Start the row by placing the plank with tongue facing the wall. Continue with the first row, using the tongue and groove to interlock planks, making sure the row is straight and parallel with the wall. If you are laying laminate flooring in a kitchen or bathroom you will need to apply wood adhesive to all end and side tongue and groove joints.
Share this Post
latest post
-
 Universal Condenser Fan Motor June 30, 2023
 -
 Root Cellar Temperature June 30, 2023
 -
 Residential Heating And Cooling Systems June 30, 2023
 -
 Damp Basement Floor Solution June 30, 2023
 -
 Furnace Return Air Ducts June 16, 2023
 -
 Return air Grille May 22, 2023
 -
 Damp Proofing membrane Manufacturers May 17, 2023
 -
 Crawl space ventilation formula May 12, 2023
 -
 Wood cold air return covers May 7, 2023